Part I: Is Recycle Bin Recovery Possible?
Part II: How To Recover Files From Empty Recycle Bin
Part III: Recover Files From Recycle Bin Normally
With increasingly complexities and added features, there are so many icons and options in cramped operating system menus today. Surprisingly, more and more people are looking for ways to recover deleted files from Recycle Bin because of accidentally clicking on the wrong option. Did you do that, too? Read on.

Part I: Recycle Bin Recovery Possible?
By default, your Recycle Bin has a setting that, if you have not changed it, makes data recovery possible. Some advanced/ enthusiast users change this setting to free up space on their disk, so if you are one of those, you are out of luck.
Step 1: Right-click on Recycle Bin and go to Properties.

If this is enabled in your Recycle Bin settings, then you are out of luck.
If not, then files in Recycle Bin will not be deleted immediately but after 30 days, so you will be able to recover files from Recycle Bin till 30 days from sending the file(s) to Recycle Bin.
What about if the files are not there, or if they are older than 30 days? In that case, you will have to use a specialized data recovery software.
Part II: How To Recover Files From Empty Recycle Bin
An empty Recycle Bin complicates matters a little. That’s because there is no built-in way for an average consumer to recover files that are not in Recycle Bin anymore. There is a Microsoft’s own Windows File Recovery tool you can download and use from the Microsoft Store, but that is a command line tool, not the kind of user interface most users are familiar with. So, for users who want a GUI-based software they can use with their mouse pointers, there are several options in the market if you are looking for one. How to pick the right one for your needs?
How To Choose The Right Recovery Software For Your Needs
Choosing the right recovery software is important because your data needs to be recovered quickly and safely. You do not have room for trial and errors here.
Tip 1: Research
Developers can claim anything about their software. How do you know if the claims are valid? You read online reviews from both reputed reviewers and everyday users to get a better picture with regards to claims versus actual performance.
Tip 2: Choosing Between Free And Paid Software
We all love free software, but that saying about you getting what you pay for is not that out-of-whack as it is made out to be, especially when it comes to software of importance such as data recovery software for Windows and Macs. Weigh in the features wisely and if needed, choose the paid software from a reputed developer with a history of churning out great software because there is a reason they are and have been in business for a while.
Now, let’s talk about a data recovery software that has received consistent praise from both professional reviewers in magazines as well as everday users – Wondershare Recoverit.
Users love the accuracy, the speed, the ease of use and feature-richness of Wondershare Recoverit, especially its dedicated Recycle Bin scanning mode. This mode saves time by scanning only the allotted disk space for Recycle Bin instead of scanning the entire disk. That way, the scans are faster, and users can get their files and data back from Recycle Bin quicker.
Step 1: Launch Wondershare Recoverit and choose Recycle Bin:

Step 2: Wait for Recoverit to finish scanning:

There are two scan modes in Recoverit – the All-round Scan and the Deep Scan. All-round scan is the scan that starts automatically when a user clicks on Recycle Bin location. It is a quick scan that works for most users.
When the all-round scan completes, users get a prompt for Deep Scan. Use this if the all-round scan did not get you the desired results.
Step 3: There are filters you can use to narrow down the results and there is even the option to search for a filename. When the scan is finished, choose the file(s) by clicking the checkbox(es) beside the filename(s). Alternatively, click the single checkbox at the top to select all files in one go.

PREVIEW FEATURE: You can double-click a file to preview it before you decide to recover it.
Click Recover at the bottom when you are done selecting.
Step 4: Choose the path to save, and click Recover.

Part III: Recover Files From Recycle Bin Normally
Windows operating system novices might think that when you send a file to Recycle Bin, it is gone forever. That is not the case, by default. Most files, up to a size preset by the OS for Recycle Bin, can be recovered from the Bin.

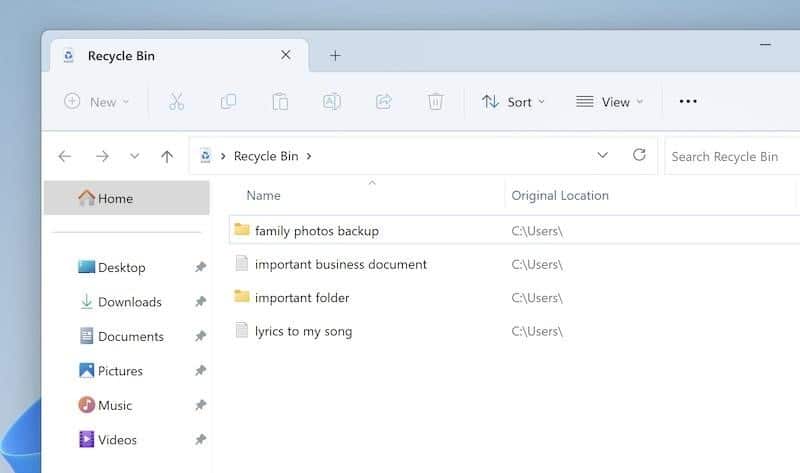
If your Recycle Bin looks full like this, it means there are one or more files in it.
Step 1: Double-click the Recycle Bin icon to open it.

Step 2: Select the folder(s) or file(s) and click Restore The Selected Items. To simply restore all items in the Bin, click Restore All Items. Now, if you cannot see the mentioned options, click the ellipses to reveal the menu with those options:

The files will be restored and put back in the locations they were deleted from.
Conclusion-
Deleted file recovery from Recycle Bin is not a myth. It is very much a fact and way of life, given the right circumstances. If your Recycle Bin looks full, chances are the files you want to recover are sitting right there in the Bin, and all you need to do is restore them with one click. However, if the files are not there, then you need a data recovery tool that can recover files from Recycle Bin such as Wondershare Recoverit, a tool that has received critical acclaim from all corners of the world, be it reviewers in magazines or the millions of users around the world.


